Outlook 2013 email server settings can be changed very easily. Usually when there is a need to change these settings you are usually facing a: change of password, mail server, security setting. Also, you may want to customize the settings like; how the name is displayed to people who have you listed as their contacts.
Though, the change of settings follows a different method each depending on the account type involved. Like; if an Exchange account is concerned, only the server administrator has the right to make customizations like; how a certain user’s name appears to people.
Following is a guide that assists you in resetting the mail server settings Outlook 2013 for Windows OS.
NOTE: Make sure you carefully follow all the steps as advised and do not miss any of them, to avoid inconvenience.
Reset Mail Server Settings Outlook 2013 for Windows OS
- Open Microsoft Outlook 2013
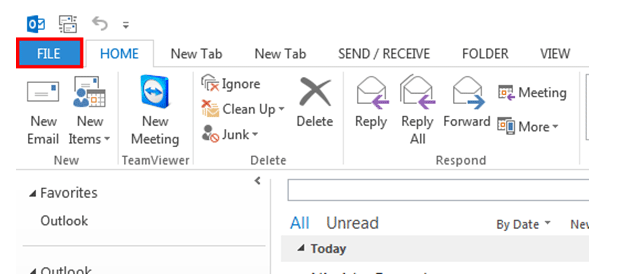
- Click on File tab from the main menu
- Click on Info to view Account Information
- Click on Account Settings and select ‘Account Settings…’ from the drop down
- Click on Email Tab on the dialog window for Account Settings.
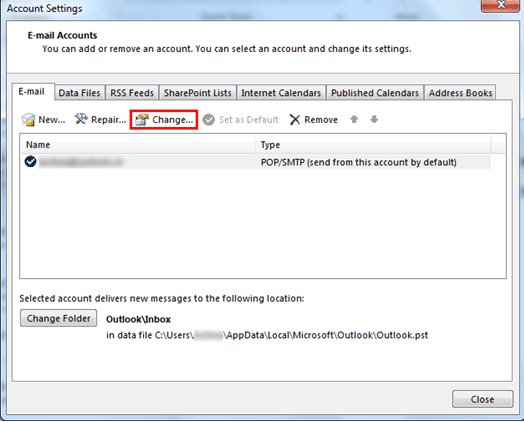
- On the tab, select your account and click on Change to begin resetting the server settings of the account
- A Change Account window will appear, on it, enter the required information in the provided fields.
- Name
- Email Address
- Account Type
- Incoming & Outgoing Mail Server
- User name
- Password
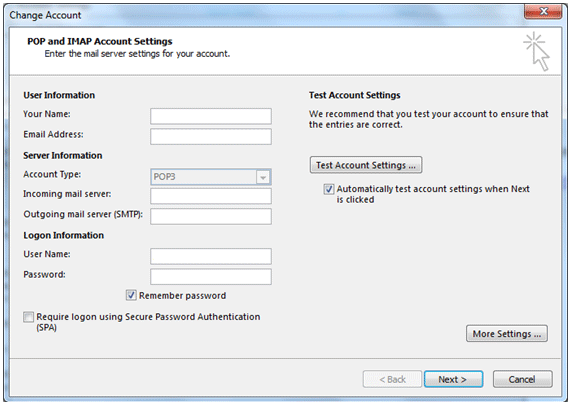
- Once done, click on More Settings button given on the bottom right side of the window.
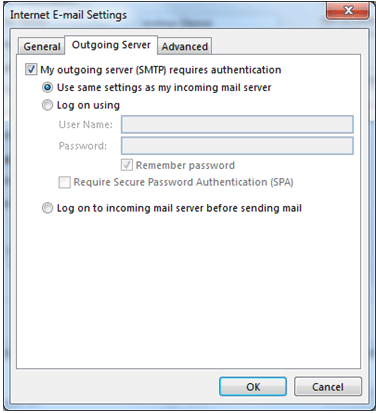
- Click on the tab for Outgoing Server and select the checkbox for ‘My outgoing server (SMTP) requires authentication’.
- Click on ‘Log on Using’ and provide respective account credentials in the given fields.
- Go to Advanced tab. Observe the following and proceed if correct:
- Incoming Server Port Number – 993
- Outgoing Server Port Number – 465
- And SSL selected for both as the preferred encrypted connection
- Inbox selected as the Root Folder Path
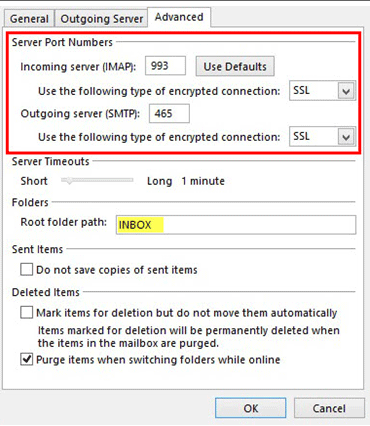
- Now Click Ok.
- Click Next on the window that appears
- Click on Finish to close the dialog box for ‘Change E-mail Account’
- Finally, click Close on the next window
Conclusion: This guide has offered the complete and detailed steps for a clear view at how the mail server settings Outlook 2013 for Windows OS can be changed. As stated in the beginning itself, the steps may vary depending on the type of configuration. Feel free to comment below in case of any query and a quick response can be expected. We also serve solution to transfer/migrate Outlook for Mac data to other platforms, to know more drop in a query for the same.

Mayra Cristina Lovato

Latest posts by Mayra Cristina Lovato (see all)
- Best Way to Sync Outlook Contacts and Calendar with iPhone - December 16, 2015
- Recover Missing Outlook 2011 data like Email Messages & Contacts - December 10, 2015
- An Overview of Communicator for Mac 2011 on Corporate Network - July 15, 2015
- How Autodiscover Service Works with Outlook 2011 for Mac - July 6, 2015
- How to Turn logging on or off in Outlook for Mac 2011 - July 3, 2015
